Archive | medium difficulty RSS feed for this section

52_Monster Maker

31 Dec

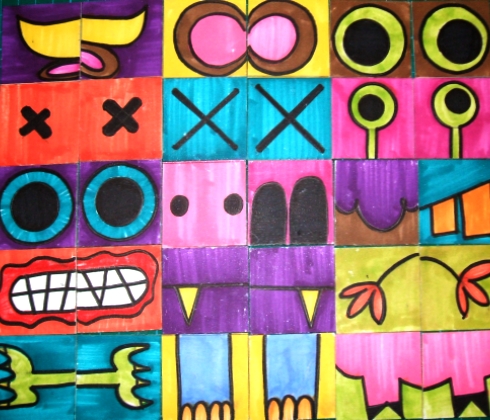
Big eyes or small, chunky nose or no nose at all, 2 pairs of hands and hands that look like feet… all is possible with the Monster Maker.

© 2011 Fernanda de Uriarte

It will take you around an hour an a half to make a 30 tile Monster Maker.

You´ll need:

_A 30x30cm piece of mount board or thick card

_Pencil

_Ruler

_Cutter or scalpel and a cutting mat or surface to cut on

_Black liner or felt tip pen

_Coloured pencils, markers or crayons.

How to make your Monster Maker:

1. Make a 6×5 grid on the board. Each square of the grid should be 5x5cm.

2. Cut all the tiles out.

3. Draw a circle with a smaller circle inside in 2 of the tiles. This is your first pair of eyes.

© 2011 Fernanda de Uriarte

4. Make a few more pairs of eyes. Maybe some look like alien or frogs eyes or just like X’s. The idea is to have a good range so that you can make all sorts of combinations.

5. Do the same with arms, legs, mouths, ears and noses. I made noses that look like piggy noses and chunky ones; cows ears with horns and monkey ears; mouths with shiny teeth and pointy teeth…

6. When you have all your range of body parts add colour. Try to use bright colours and colour the full tiles, that is including the background.

7. Draw over all the edges with your felt tip pen to define the shapes and make the colours stand out.

© 2011 Fernanda de Uriarte

That’s it! Now you have 30 tiles to mix and match and make all sorts of monsters.

© 2011 Fernanda de Uriarte

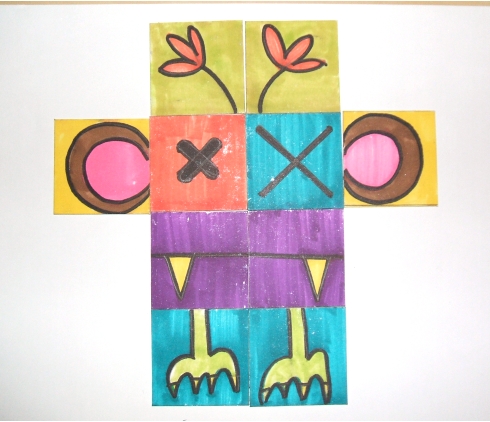
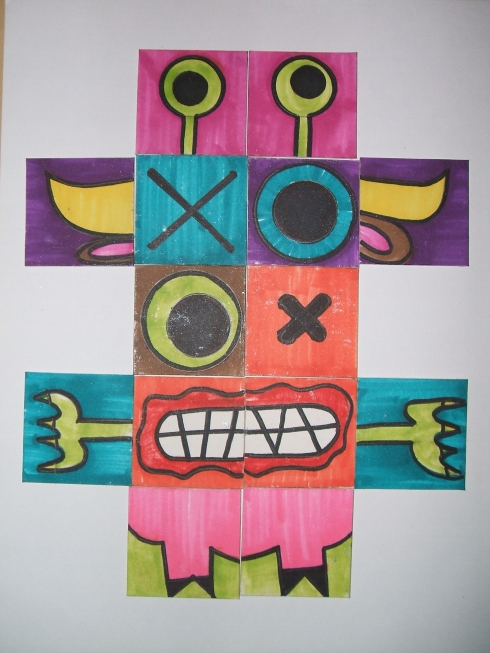
You can make scary monsters and friendly monsters.

© 2011 Fernanda de Uriarte

See how you can mix the eyes and make a pair of hands look like antennae?

© 2011 Fernanda de Uriarte

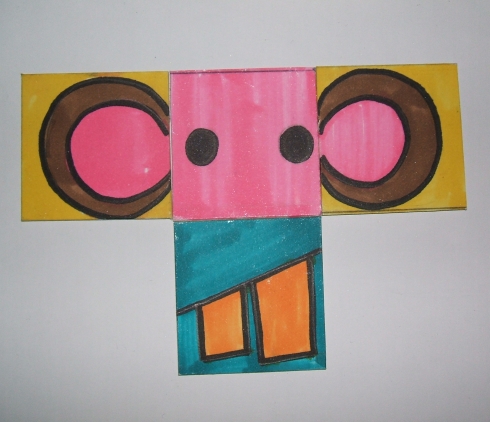
and make a piggy nose look like eyes?

© 2011 Fernanda de Uriarte

Make shorter monsters or taller ones…

© 2011 Fernanda de Uriarte

…and even ones that forgot to wear their pants!

© 2011 Fernanda de Uriarte

You can make lots and lots of monsters with this Monster Maker and even more if you decide to make more tiles. Use your imagination and have fun!

44_Pattern Puzzles

30 Dec

If you like shapes, patterns and puzzles keep reading.. this one’s for you.

© 2011 Fernanda de Uriarte

It will take you about 2 hours to make a 49 tile set of Pattern Puzzles.

You’ll need:

_A 50×50 cm piece of black mount board
 
_Ruler
 
_Pencil
 
_Cutter or scalpel and cutting mat
 
_Metallic gel pen (I used silver but you can use any colour you like)
 
_Black felt tip pen
 
How to make the Pattern Puzzles:
 
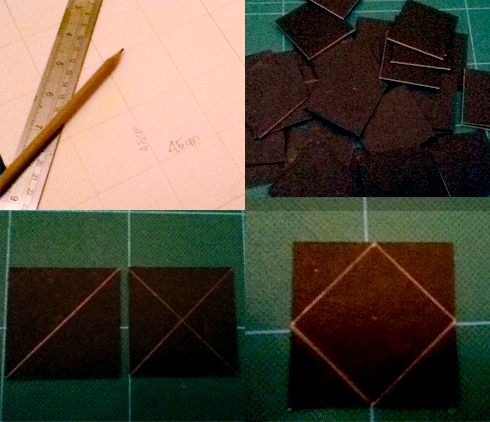
1. Make a 7×7 grid on the back of the mount board. Each square on the grid should be 4.5×4.5cm
 
2. Cut all the squares. I’ll call them tiles from now on.
 
3. Using your pencil and ruler, draw a diagonal line on one of the tiles from one corner to the opposite one.
 
4. Draw an X on another one by making two diagonals.
 
5. Get a third tile and draw a smaller square inside it, rotated 45°. To do this, find the middle of each side of the tile and then connect those points with a straight line.
 

© 2011 Fernanda de Uriarte

 
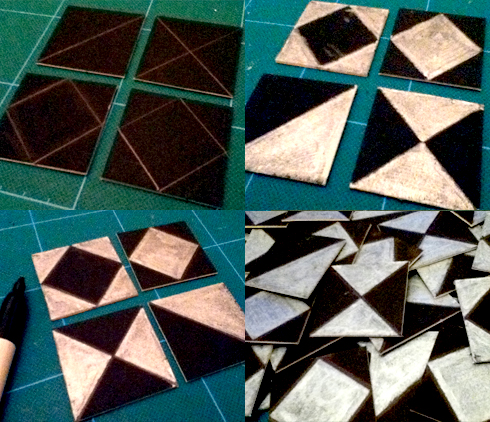
6. Repeat step 5 to make another tile with an inner square so that you have 4 tiles: one with a diagonal, one with an X and 2 with an inner square.
 
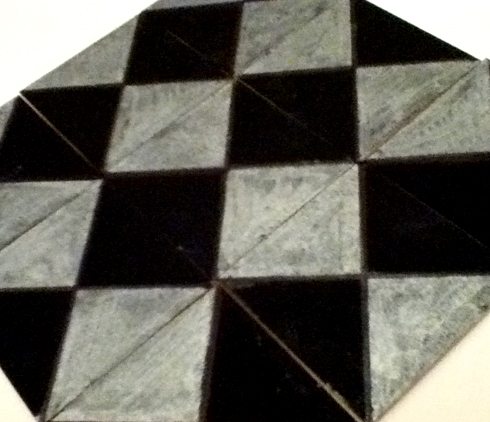
7. With your metallic pen, colour each of the tiles as shown below. You’ll have 4 kinds of tiles: one that is half metallic-half black; one with the sides of the X in black and the top and bottom in a metallic colour; one with a black square and 4 metallic triangles surrounding it; and one with a metallic square and 4 black triangles surrounding it.
 
8. All the edges look a bit rough now, so use your felt tip pen and ruler to trace over all the edges again.
 
9. Repeat steps 3 to 8 until you have 11 tiles of each kind and 5 all- black tiles.
 

© 2011 Fernanda de Uriarte

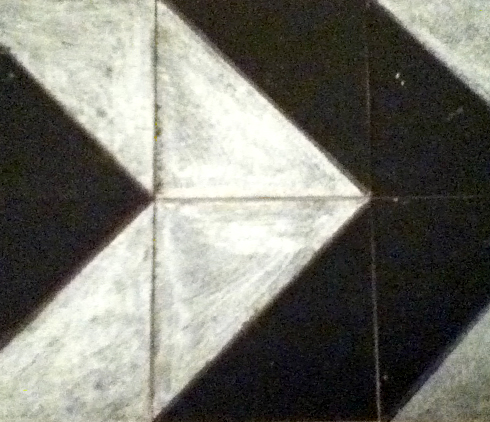
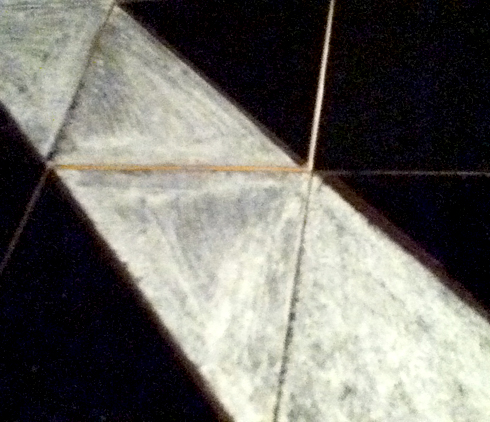
That’s it! Now arrange all the squares in different ways to create all sorts of patterns.

© 2011 Fernanda de Uriarte

 Can you make arrows and straight lines?

© 2011 Fernanda de Uriarte

© 2011 Fernanda de Uriarte

You can play with someone else and challenge them to make the same pattern as yours with a timer; or if you want to make it harder, challenge them to make the negative of your pattern! (so where yours is black theirs should be metallic and the other way arround)

© 2011 Fernanda de Uriarte

 Have lots of patterned fun!

41_Seymour the Lemur

6 Dec

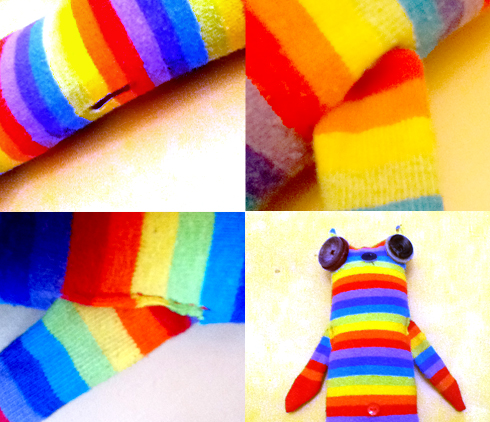
With his stripy body and his huge round eyes in my house now lives a lemur.

Used to be a sock, now he can even walk… everybody welcome Seymur.

© 2011 Fernanda de Uriarte

Seymour the Lemur is easy to make. It will take you about an hour if you have a sewing machine, maybe 31/2-4 if you don’t.

You’ll need:

_A sock, the longer the better.

_4 big buttons. Try to get two of them slightly bigger than the other two.  (these will be the huge round eyes)

_2 small buttons (to make the nose and belly button)

_thread and needle

_scissors

_filling (it can be cotton or a synthetic filling. try to get a washable kind, Seymour might need a bath every once in a while!)

Making Seymour the Lemur:

PARENTS: KEEP AN EYE OR HELP OUT YOUNG CHILDREN WITH THE SEWING.

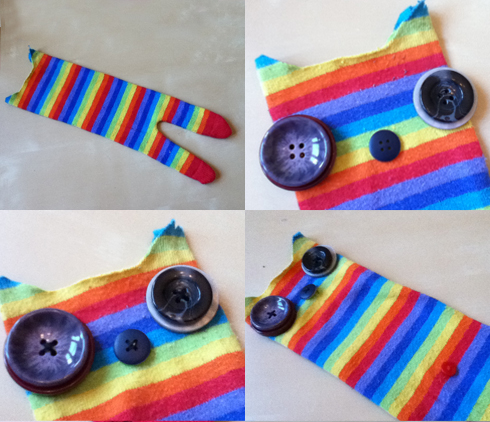
1. Cut the end of your sock, where your foot goes in. Don’t get rid of it; we’ll use it later.

2. Turn what’s left of the sock  inside out and draw the shape of Seymour. Ears at the top and legs at the bottom. We’ll take care of the arms and tail later.

3. Sew the legs over the line you just drew.

4. Cut the sock about 5mm from the stitches.

5. Cut the top about 5mm from the ears/head line. Don’t sew yet.

© 2011 Fernanda de Uriarte

6. Turn the sock right side out.

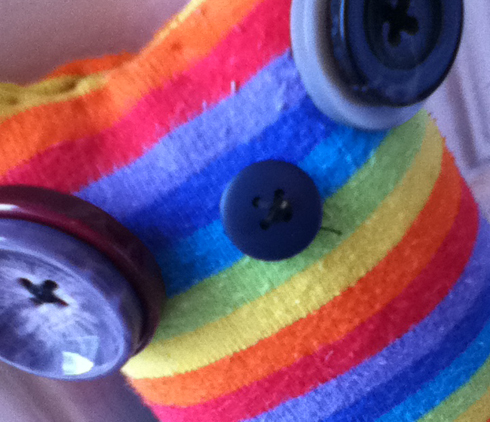
7. Grab the 4 big buttons and one of the small ones and sew them to make the eyes and nose. Remember lemurs have huge eyes so we’re sewing a big button on top of a bigger one for each eye. Sew the eyes as far from each other as you can to give Seymour a very lemur-like expression.

8. Sew the other small button further down, closer to the legs to make a belly button. It´s starting to look like Seymour, isn’t it?!

© 2011 Fernanda de Uriarte

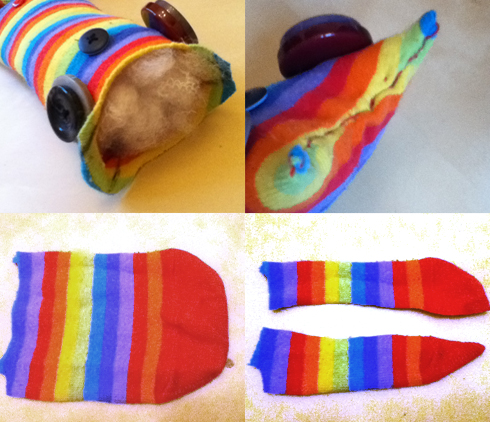
9. Fill the sock with the filling. The legs can be a bit tricky cause they´re so thin, so put little bits at a time.

10. Sew the top of the head to close the whole thing up.

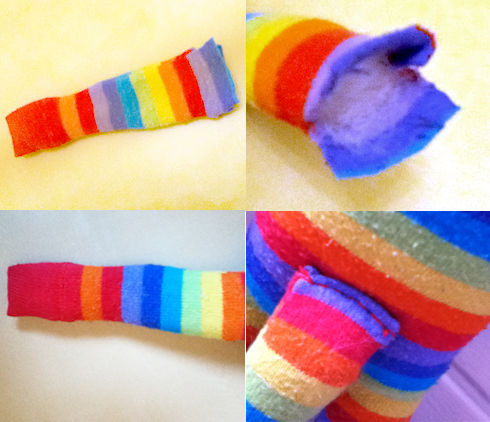
11. Get the tip of the sock and cut it, length wise, in 3. The middle part should be thicker to make the tail.  The 2 ends will make the arms.

12. Turn the arms inside out and sew the edges. They are probably very thin so you might not need to feel them (I didn’t). Turn them right side out again.

© 2011 Fernanda de Uriarte

13. Get the body and cut 2 slits round about the middle on each side. This is where the arms will go.

14. Insert both arms, about 5mm-1cm,  and sew the slits close.

© 2011 Fernanda de Uriarte

15. Get the remaining bit of the sock, turn it inside out and sew the sides.

16. Turn the tail right side out and fill it. The tail is thin too so remember to do it little by little so that you don´t end up having bumps and lumps of filling but a nice soft and even fluffy tail.

17. Sew the tail on the back of Seymour’s body, about the same height as the belly button.

© 2011 Fernanda de Uriarte

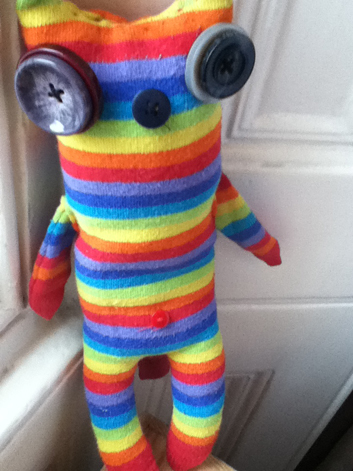
Ta da!!!

© 2011 Fernanda de Uriarte

Look at him, so cute, with his big round eyes and stripy body.

© 2011 Fernanda de Uriarte

Have fun and take good care of Seymour the Lemur.

38_Organic Mr. Potato Head

27 Oct

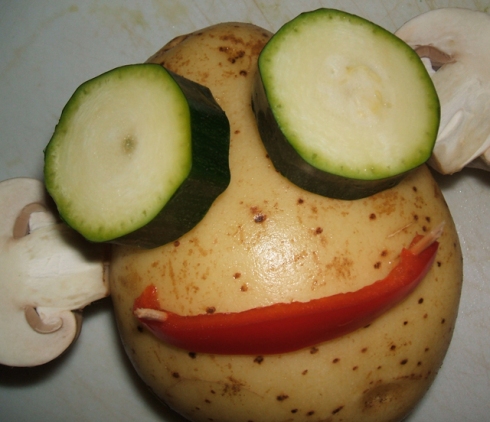
Not the biggest fan of veg? Organic Mr. Potato Head will have you begging for more!

© 2011 Fernanda de Uriarte

It is super easy to make but you´ll need the help of a grown up to help you cook the vegetables.

You´ll need:

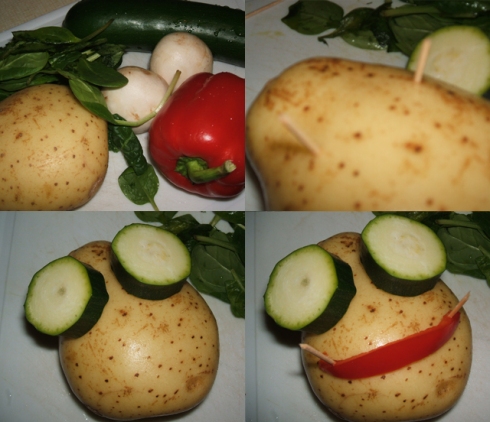
_ A boiled or baked potato

_Cooked vegetables that could work as eyes, nose, ears, etc..

_A few toothpicks.

How to make Organic Mr. Potato Head:

1. Stick a couple of toothpicks into the potato where you want the eyes to be.

2. Grab a couple slices of veggie goodness and stick ’em on the toothpicks to make the eyes of Mr. Potato Head. I used courgettes.

3. Keep going until you’ve given Mr. Potato Head a mouth, ears, hair and whatever you can think of.

© 2011 Fernanda de Uriarte

© 2011 Fernanda de Uriarte

4. Eat your vegetables and see Mr. Potato change.. Add more stuff and eat it all again.

5. Repeat the process until you´ve finished all your vegetables!

© 2011 Fernanda de Uriarte

Why not try a Mrs. Egg plant Head Miss Tuti Fruty?…

Mr. Beetroot? Yeah I know.. that was pushing it a bit too far.

Have tons of healthy fun.


37_Building Set

27 Oct

If you dream of being an architect, like playing house or have tons of interior design (or IKEA) catalogues lying around, this toy is for you.

© 2011 Fernanda de Uriarte

It will take you about an hour to make a building set of  24 pieces.

You´ll need:

_2 A4 pieces of card

_Ruler, pencil, cutter/scalpel and cutting mat.

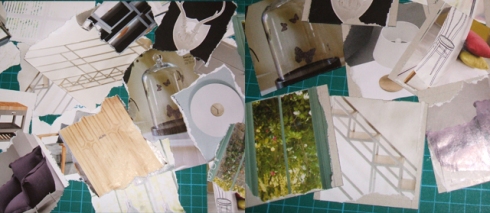
_A few magazines or catalogues with images of house/building stuff.

_Glue stick.

How to make your Building set:

1. On each of your A4 pieces of cardboard draw a grid of squares 7×7 cm. You`ll be able to fit 4 squares across and 3 down (12 total on each A4, 24 total)

2. Draw a vertical line 5mm into the square from each side of the squares.

3. Mark the middle of each of this new lines.  (check the photo below)

4. Cut all the squares.

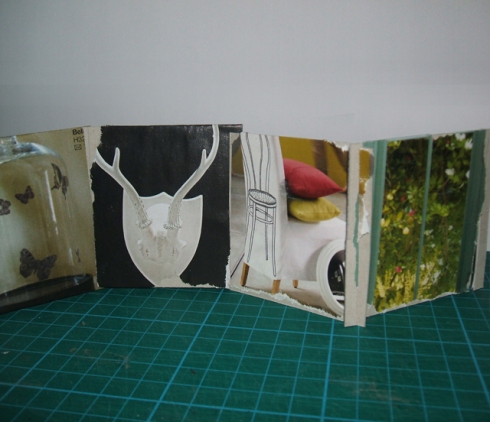
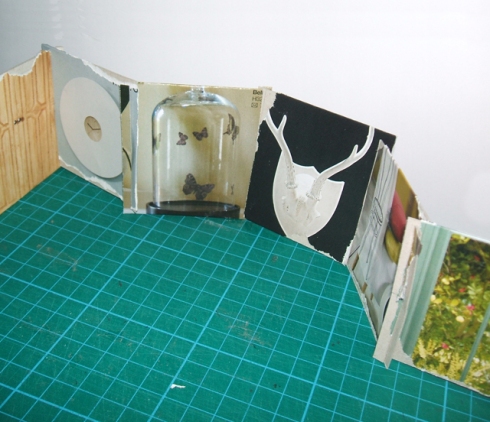
5. Make a slit from the half down on each of the vertical lines 5mm in. You should have 2 slits on each square that will allow you to slot them together as shown below.

© 2011 Fernanda de Uriarte

6. Rip a bunch of nice images off your catalogues/magazines. Try to get a bit of everything: windows, doors, staircases, furniture… Make sure you have at least 24 images to cover at least one side of each square. If you have more you could cover both sides and build  interiors and exteriors.

7. Stick the images on the card squares. Make sure to cut over the pictures if you covered the slit when sticking on the card. Note that in order to build you must alternate between slits facing up and down, so make sure you stick some images facing up, and some facing down.

© 2011 Fernanda de Uriarte

8. Slot the squares together, stack them, arrange them as you like…

© 2011 Fernanda de Uriarte

© 2011 Fernanda de Uriarte

© 2011 Fernanda de Uriarte

© 2011 Fernanda de Uriarte

What if instead of sticking images you drew each bit of your building?… or how fun would it be to use pictures of car parts or robot parts?!

Use your imagination and get building!

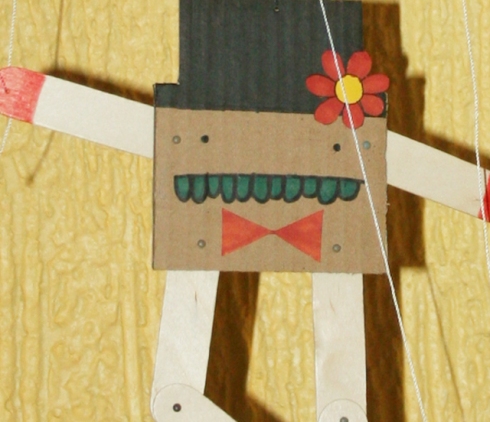
30_Mr. Flowerpond (o Sr. Floripondio)

22 Aug

Take him out for a dance and you won´t be disappointed.

© 2011 Fernanda de Uriarte

It is not very hard to make this puppet; be patient though, when it comes to piercing holes in the wood sticks and tying up the stings. It could take you up to 2 hours to make.

You`ll need:

_A piece of cardboard. It could be a recycled cereal box or back of a paper block or even a piece of corrugated cardboard from packaging.

_Pen and pencil

_Coloured pencils, markers, crayons…

_6 wooden sticks.

_6 small brads

_A piece of paper to draw extra details.

_3-4 m. of thick cotton thread.

_The point of a compass, circle cutter or something similar to pierce little holes in the cardboard and sticks.

_Glue stick

_ UHU or hot glue.

How to make Mr. Flowerpond

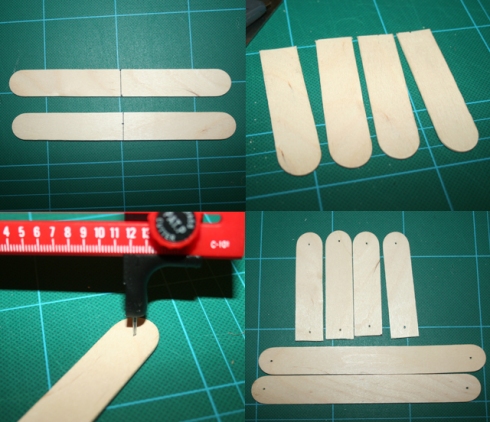
1. Cut 2 of the wood sticks by the middle.

2. Use the point of a compass/circle cutter to pierce a tiny hole on each end of the 4 half-wood sticks you were left with and at both ends of 2 complete ones.

© 2011 Fernanda de Uriarte

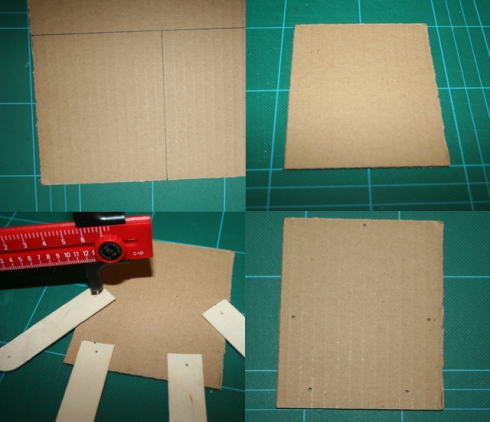
3. Cut a rectangle off the piece of cardboard, about 10×12 cm.

4. Place 4 sticks over the cardboard rectangle as if they where the arms and legs.

5. Use the point of the compass/circle cutter to pierce through the cardboard, using the holes previously pierced through the sticks as guides. Punch an extra hole at the top, right in the middle.

© 2011 Fernanda de Uriarte

6. Use a pencil to draw the face of your character/body of your character. Mine has a hat and some room for a bow tie.

7. When you`re sure about it, draw over it with a black pen to make it stronger.

8. Cut away the extra bits to make the shape of the hat.

9. Use your extra piece of paper to make details, like a bow tie or a flower for the hat.

10. Add some colour and stick the extras.

© 2011 Fernanda de Uriarte

11. Get 2 of the short sticks and colour the tips to make the hands.

12. Get the 2 long ones and colour one tip of each to make the feet/shoes.

13. Get one a foot (a long stick) and a short stick (not a hand) and join them with a brad.

© 2011 Fernanda de Uriarte

14. Now get 4 brads and join the arms and legs to the cardboard body by the holes you pierced earlier.

You should now have the body with moving arms and legs.

© 2011 Fernanda de Uriarte

15. Cut 5 pieces of string about 60cm. long

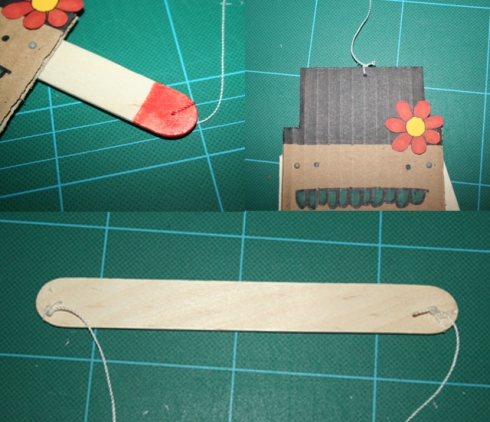
16. Get the 2 remaining wood sticks and pierce a hole though both ends of both sticks.

17.  Pierce an extra hole right in the middle of one of the sticks.

18. Get a piece of string and pass it through the hole at the end of one of the legs. Tie a knot behind it.

© 2011 Fernanda de Uriarte

19. Do the same for the other leg, both arms and the hole in the middle of the hat.

20. Use the same colour marker you used to colour the hands, etc. to colour the string that goes to each particular hole.

21. Tie the loose ends of each string to the sticks in the following way:

– Start by tying the strings that come out of the legs, one to each side of the same stick.

– Get the string that is tied to the top of the hat and tie it to the middle hole of the other stick. Before you tie the knot, make sure that both sticks are at the same distance form the puppet. You´ll have some spare string.

– Tie the strings that come out of the hands to the remaining holes; once again, make sure that the sting is the right length to get the stick at the right distance.

22. If the knots feel a bit “slippery” put a drop of glue on top of each so that they stay in place.

© 2011 Fernanda de Uriarte

That´s it…Mr. Flowerpond is ready to go dancing.

© 2011 Fernanda de Uriarte

Enjoy

26_Camera Obscura (with 4x optical zoom)

3 Jul

Did you know you can take pictures with a cardboard box with a tiny hole in it? Did you know you can also make pretty accurate drawings using the same device? And that great artists such as Leonardo, used something similar to trace the outlines and minor details of their paintings?

Well now you´ll be able to do great drawings to cause today we´re gonna make a pin hole camera, zoom included. (for making drawings, no photos)

© 2011 Fernanda de Uriarte

It´ll take you about an hour and a half to make and as much time as you like to make your drawings.

You`ll need:

_To print and download the following files:

cameraobscura_1

cameraobscura_2

cameraobscura_3

cameraobscura_4

_4x A4 cardboard pieces (you could recycle cereal boxes or the back of paper blocks)

_Tracing paper

_Ruler

_Rutter/Exacto knife and a cutting mat or surface to cut on.

_Pin, needle or the pointy end of a compass/circle cutter.

_UHU glue.

_Glue stick or Spray Mount (I’d suggest you go for Spray Mount, it´s easier to use, just remember to use it in an open space)

_Black throw or piece of thick fabric, maybe a T-shirt or a jumper (sweater).

_Black felt tip pen or thin liner

_Coloured pencils, crayons or markers.

How to make your Camera Obscura:

1. Print the files above and stick them to the A4 pieces of cardboard. Use just enough Spray Mount (or glue stick) so that the prints stay while you cut and still you are able to “peel” them off when you’re done)

2. Cut all the pieces over the black lines. Pass the cutter a few times over the red dotted lines without going all the way through. This will allow you to fold all the sides and tabs back.

3. Using a pin, needle or pointy end of a compass/circle cutter, punch a tiny hole where indicated with a tiny purple cross. .

4. Peel the prints off and fold all the pieces where indicated. (make sure you mark, maybe with your knife, where the tiny squares are supposed to go; they are marked in purple in the prints)

© 2011 Fernanda de Uriarte

5. Put UHU glue on the tabs and stick everything together. When putting together the piece with the pin hole, make sure you stick the funny shaped bits inside the square sides. (check image below) This will make a kind of rail for the other piece to slide back and forth into this one without going out. This will make the zoom of your camera obscura.

6. Stick the tiny squares in place.

7. You should now be able to slide the piece with the tiny squares into the one with the rails. Make sure the “frame” in the inner piece is facing out. If you feel like it´s too loose, add an extra tiny square on each side.

8. Stick the remaining piece together. It is some sort of cap with a frame on one side.

© 2011 Fernanda de Uriarte

9. To make your Camera Obscura a bit more fun, make a drawing on the side that has the pin hole. Mine has a huuuge eye….

10. We need a surface to capture light and be able to draw. Cut a 9.5×9.5 cm square out of tracing paper.

11. Without using any glue, put the tracing paper square into the “cap” piece.

12. Now put the “cap” with the paper on the camera.

© 2011 Fernanda de Uriarte

Great! Your camera should work now…Ready to make some drawings?

13. Get the black throw or piece of fabric and your black pen and go outside. (you could do it inside but you have to look out the window, it doesn’t work indoors).

14. In order to see what the camera produces you need to be in complete darkness, so, cover the camera and yourself with the throw. Leave the pin hole free. (check the intro photo or the one below)

15. Give your eyes a few moments to adjust and TA DA!!! You’ll start to see the image on the paper! Zoom in and out by sliding the inner cube back and forth.

16. Now you can draw on the paper whatever you see. You`ll need to be really coordinated for this: hold the throw and the camera with one hand and draw with the other!

17. When you’re done tracing, get the piece of paper out of the camera, add details and colour and that’s it!

Cut more tracing paper squares to make as many drawings as you like.

© 2011 Fernanda de Uriarte

Bet your drawings are looking great (and that you look great while using your camera).

Beware great artists… you’ve got competition!

24_Mix ‘n match pals

23 Jun

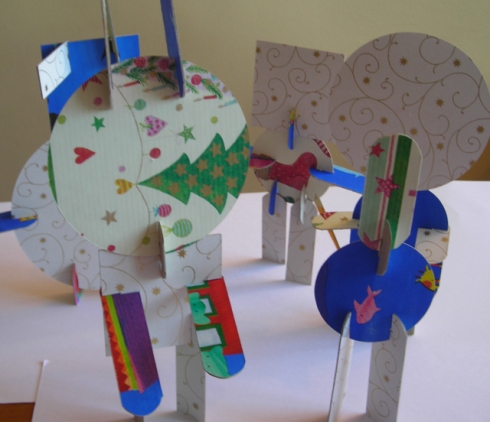
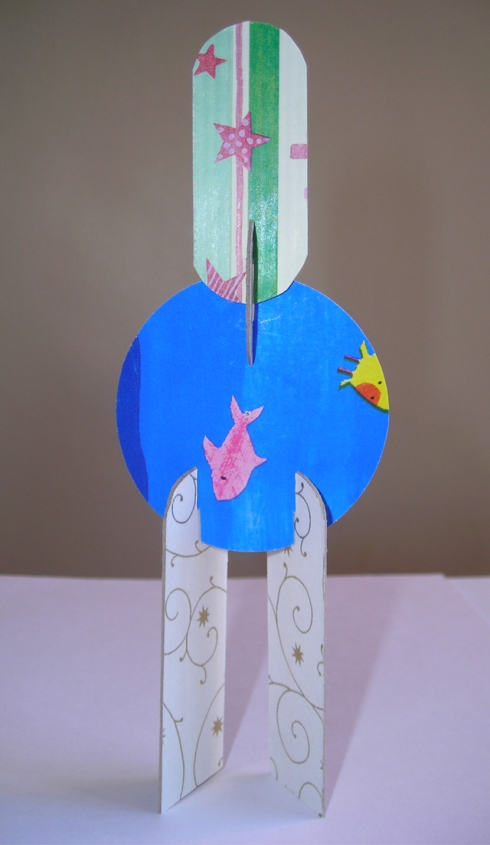
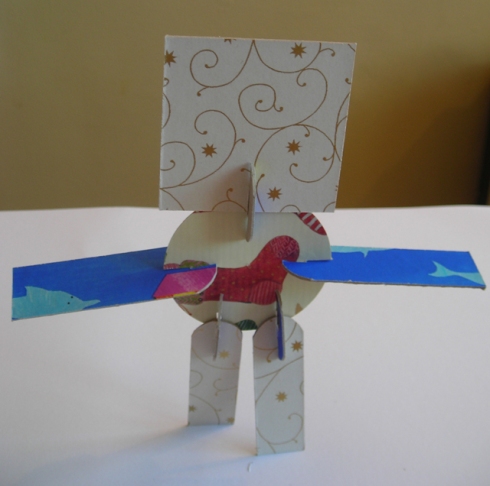
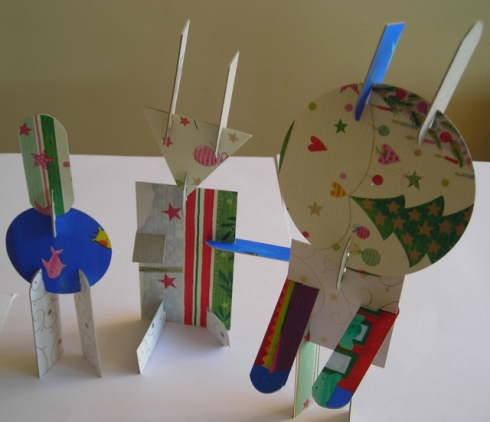
A leg from over here, an arm from over there, the head of another pal, a random body, and there you go.. mix ‘n match all the pieces to make new pals every time.

© 2011 Fernanda de Uriarte

This is an easy one; there´s a lot of cutting involved so it´ll take you a couple hours

You’ll need:

_To download and print these files:

pals_1

pals_2

pals_3

_3 x A4 pieces of card, about 1mm thick (remember to recycle when posible).

_Some wrapping paper left overs (the pieces should be large enough to cover  A4  cards).  You could also use decorative paper, like the one for scrap booking.

_Circle cutter, cutter and cutting mat (or a surface to cut on)

_Ruler

_Glue stick or spray mount (the latter will make your life a bit easier)

How to make your Mix n’ match pals:

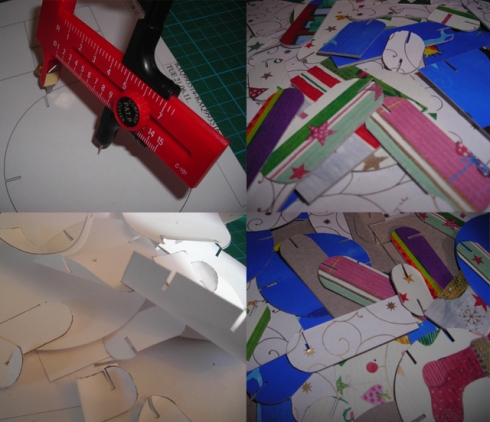
1. Print the files above. If your printer takes it, you can print straight on the card. Otherwise, print on regular paper and stick the prints on one side of the card. (I like the card to be visible in the end, so I use just enough glue/spray mount to make the prints stay while I cut and then easily remove them when I’m done)

2. Cut 3 pieces of wrapping paper about the size of an A4 card. If you have different colours of paper, cut one piece of each.

3. Stick one piece of wrapping paper on the back of each card.

4. Use your ruler and cutter to trim any bits of the wrapping paper that may have exceeded the card.

© 2011 Fernanda de Uriarte

5. Cut all the shapes. If you have a circle cutter you can use it to cut the circles. The center of each circle is marked with a tiny purple “x”.

6. Peel the prints off the card.

© 2011 Fernanda de Uriarte

7. Join the different pieces by the slits and that’s it! That’s the way to mix and match

© 2011 Fernanda de Uriarte

© 2011 Fernanda de Uriarte

© 2011 Fernanda de Uriarte

© 2011 Fernanda de Uriarte

© 2011 Fernanda de Uriarte

Enjoy!

PS. sorry for the delay but you know what they say, it’s better late than never.

22_The Story Maker

5 Jun

Big fan of bedtime stories? What if you could make your own? The Story Maker will give you tons of ideas for you to make tons of new stories.

© 2011 Fernanda de Uriarte

Before I go to the details let me explain a bit more: The Story Maker is tool that will give you hints to start new stories. It is a collection of words divided into 5 categories:

the good guys, the bad guys, the kind of story, setting and random words.

Each group of words is written onto a dial. As you turn the dials you get a combination of 5 words -one word from each category- giving you the characters, setting and kind of story to come up with plus a random word to fit into the story.

With this Story Maker you can get 60 different combinations, but how many stories come out of those depends on your wild imagination.

So lets get started!

It will take you about 2 hours to make. (you can take longer if you get really creative when it comes to decorations)

You`ll need:

_3x A4 pieces of card, as usual, you can recycle a box of cereal or maybe the back of a paper block.

_1 A4 piece of thicker card, about 2mm thick.

_Circle cutter or compass

_Cutter or Exacto knife

_Cutting mat or surface to cut on

_5 small brads (the ones for scrap booking are great cause they come in all colours and sizes).

_1 sheet of coloured paper (I chose black but you can use the colour you want)

_Pencil or pen

_UHU glue

_Coloured pencils, markers or crayons

How to make your Story Maker:

1. Using your circle cutter, cut 5 circles of different sizes off the thicker piece of card. (If you don´t have one, trace the circles and cut them using a cutter or your scissors). Cut the circles no smaller than 3cm in radius.

2. Divide one of your circles in 12 pieces, as if you were slicing a cake. To make all the slices the same size, place your circle cutter or compass, opened to the same distance as you used to trace/cut the circle, anywhere on the edge of the circle and make a little mark. Place it again on the mark you just made, make a new mark and so on until you come back to the first point. This will give you 6 marks. To get the other 6, repeat the process starting between 2 of the previous marks. Now trace a line going from the centre of the circle to each mark. You`ll have 12 same-sized slices.

3. Use this circle as a template to slice all the others.

© 2011 Fernanda de Uriarte

4. Arrange all your circles on one of the A4 pieces of card so that there’s a fair distance between each other.

5. Using the pointy end of your circle cutter or compass mark the centre of each circle; using your pen or pencil, mark the ends of the 2 lines that make up a slice of each cirlce.

6. Remove the cut circles and trace a circle, on the A4 piece of card, where the cut ones used to be. Trace each circle the same size as the ones you cut.

7. On each of the traced circles draw 2 lines that go from the centre to the marks of the slices (check the image below). You should now have 5 circles with one slice each.

8. Find the middle, between the edges of each slice and cut half a small circle using that middle point as the centre for this circle. (check the image below)

9. Cut over the 2 lines that made up the slice. You should now have a cut out that looks something like an ice cream cone (check the image below to make this clearer. note how I didn´t go all the way to the centre of the circle; the bottom of the cone is flat).
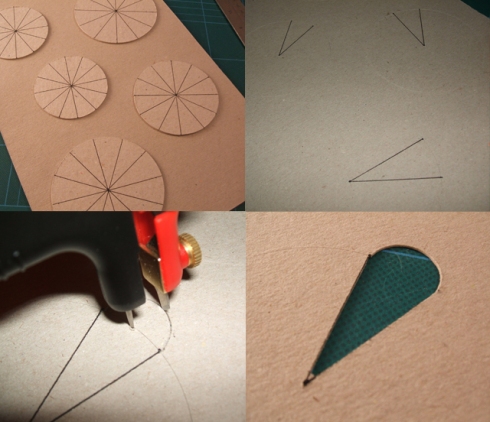
© 2011 Fernanda de Uriarte

10. Repeat steps 8 and 9 for every circle. When you finish, you should have 5 ice-cream-cone like cut outs.

11. Get the cut circles back. We´ll start getting creative and write the 12 words that will make up each category. Remember? the good guys, the bad guys, setting, kind of story and random words.

These are the words I wrote on each circle. You can use these or come up with your own.

THE GOOD GUYS:

A cowboy, a prince, Macapaca, a princess, a pirate, a mermaid, the Easter Bunny, Mum, a cupcake baker, Goldilocks and the 3 Bears, the Pink Panther and a Polar bear.

THE BAD GUYS:

A dwarf, 3 witches, Rumpelstinskin, an ogre, a bully, a thief, a snake, a king, a monster, a dragon, a wizard and a pirate.

THE SETTINGS:

Inside a volcano, on the kitchen table, under the sea, in a faraway land, inside the drawer, up in the sky, in the deep dark wood, in a candy shop, in the Chocolate Factory, in the town centre, in outer space, in an ice castle.

KIND OF STORY:

Adventure story, a story about a rescue, a sad story, science fiction, a love story, a story about exploring, a funny story, scaaaaaaarry story, a story where someone learns something, a story about helping someone, a story about magic, a story where someone makes a discovery.

RANDOM WORDS:

Jelly Beans, colourful bricks, salt and pepper, ice skates, chocolate covered raisins, a plug, a pair of snickers, swings, chicken pox, a mug of soup, a crazy cow, poo.

Now that all 5 circles have the words written on them, it is time to pin them to the card with the cut outs. I`ll call the circles with words written on them dials.

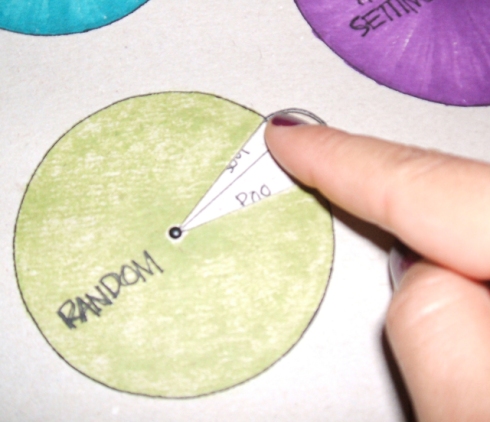
12. Push a brad through the centre of each circle on the card and its corresponding dial. Bend both ends out to fix the dial and card together, loose enough to allow the dials to turn.

© 2011 Fernanda de Uriarte

13. Once all 5 dials are in place, get another piece of card and stick it to the back of the one with the cut outs. Put glue only on the edges so that the dials can still turn freely.

You should now have 5 “windows” through which you can  turn the dials and read the words of each category.

You have the basics of your Story Maker now… the rest is making it look nicer.

14. Use your coloured pencils, markers and crayons to decorate your Story Maker. I decided to paint each circle in a different colour and write the category it shows so that I know if I´m looking at settings or good guys…

To make your Story Maker look a bit like a book we’ll attach a cover to it:

15. Cut a strip of coloured card, about 3cm wide.

16. Pass the cutter along the middle once or twice without cutting all the way through. This will allow you to fold the strip in half.

17. Put some UHU glue on one half of the stripe (on the inside) and stick it to the back of your Story Maker.

If you turn it around, you should have a loose flap on the front.
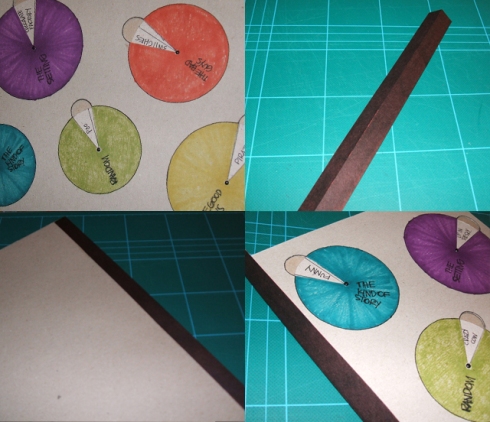
© 2011 Fernanda de Uriarte

18. Put some glue on this flap and stick the remaining piece of A4 card to it.

You should now have a cover to your Story Maker and be able to open and close it.

19. Add some details and colour to the cover and any others you like.

Ready to start making stories?
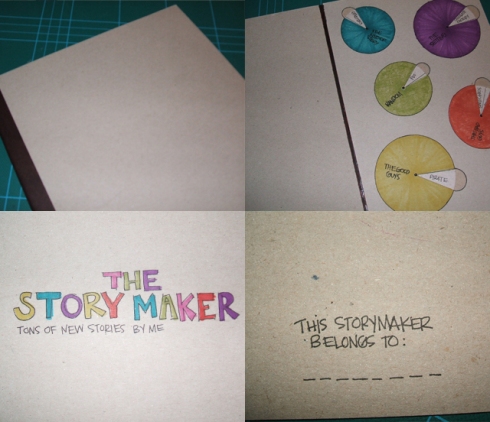
© 2011 Fernanda de Uriarte
© 2011 Fernanda de Uriarte

Turn each dial until you see a word you like through the window. Or turn the dials to get random words.

© 2011 Fernanda de Uriarte

Put all the words together and you have the basics of your new story:

How about a story about a polar bear on a quest to discover the hiding place of a pirate and his crazy cow in outer space?
or one about a cowboy that defeated a very scaryogre that lived inside the volcano with the terrible smell of his poo?

See? all sorts of stories can happen!! Just turn the dials and use your imagination.

20_Magnetican

21 May

It´s magnetic, it´s a can its…. MAGNETICAAAAN!

© 2011 Fernanda de Uriarte

This one can take you a few minutes or about an hour, depending on how much effort you put into it.
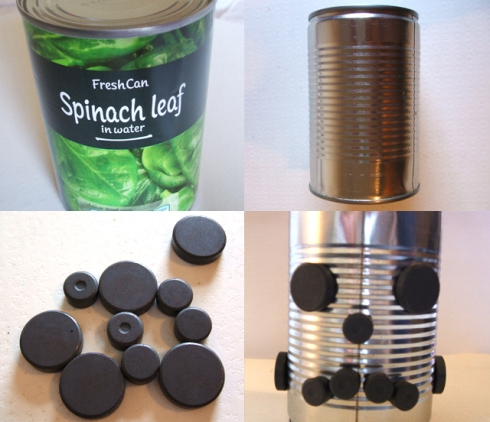
You`ll need:

_1 empty can of soup or veg.. anything but soda cause magnets don´t work on aluminum cans.

_a bunch of magnets. try different sizes.

If you want to make it more colourful and fun you`ll also need:

_coloured paper

_a sheet of white paper

_coloured pencils or markers

_large lollipop sticks

_UHU glue

_glue stick

_scissors

_cutter or Exacto knife and a surface to cut on.

Quick instructions for a super easy version and an upgrade.

_For the easy version, just eat the yummy healthy contents of the can, take the paper away, wash it and play with your magnets!

© 2011 Fernanda de Uriarte

If you wanna go for the upgraded version:

1. Cut the coloured paper the right height and length to wrap around the can

2. Fix it to the can with small magnets, this way you can change the paper to any colour you want.

© 2011 Fernanda de Uriarte

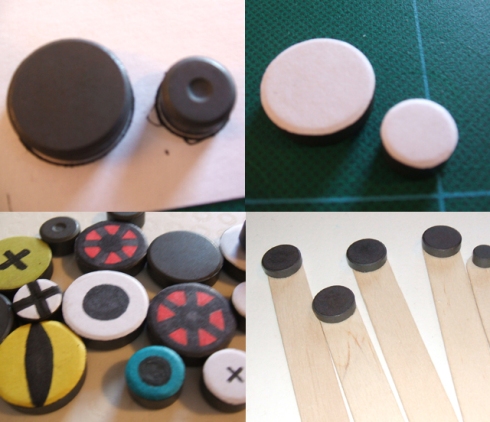
3. Use the magnets as templates to draw their shape in a piece of white paper.

4. Cut these shapes and stick them on top of the magnets using a glue stick. Keep a few without paper.

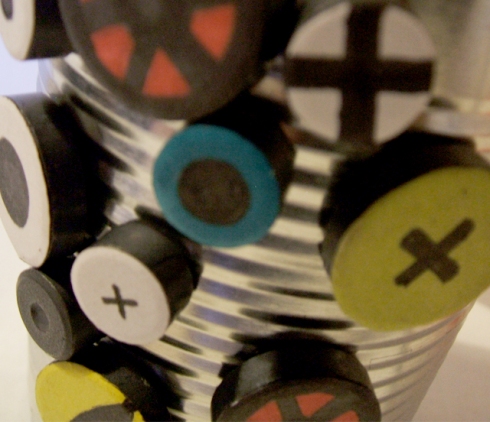
5. Draw some eyes, wheels, knots and bolts and anything you can think of.

6. Using UHU glue. stick the magnets you set aside on the lollipop sticks. These will be the arms, legs, antennae, etc of your toy.

© 2011 Fernanda de Uriarte

Thats it!!! You have all you need to make all the magnetican characters you can imagine.

© 2011 Fernanda de Uriarte

© 2011 Fernanda de Uriarte

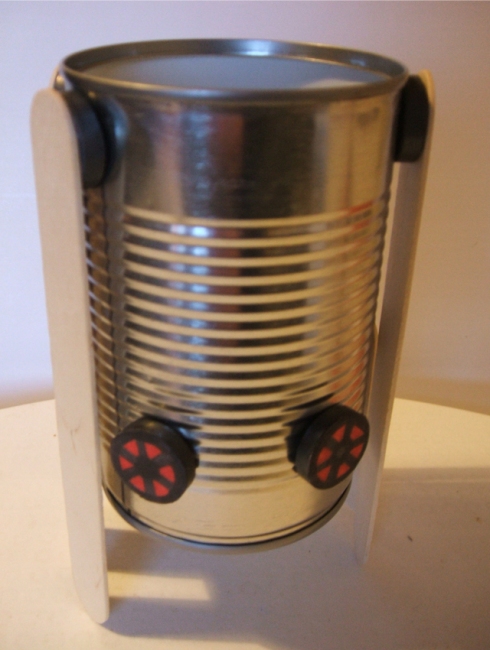
You can combine the naked can with the coloured magnets and lollipop arms

© 2011 Fernanda de Uriarte

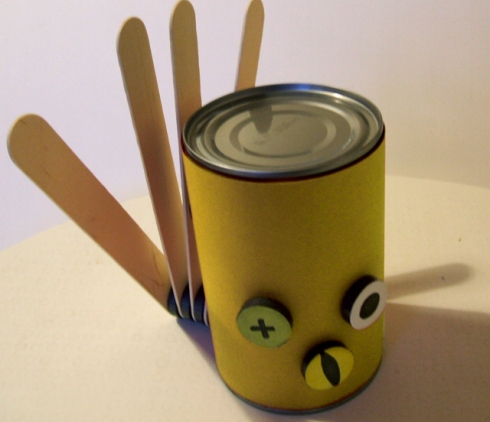
And change the colours to make other characters like this….. chicken?

© 2011 Fernanda de Uriarte

See? same as the first image but a bit of colour and personality…

Have lots of magnetic fun!