Archive | October, 2011

39_Technicolor Kaleidoscope

31 Oct

A look into analogue hyper-reality at the reach of your hand… all you need is some coloured metallic paper, a cardboard roll and interesting things to look at.

© 2011 Fernanda de Uriarte

It will take you about 20 minutes to make your Technicolor Kaleidoscope

You`ll need:

_A cardboard roll (from toilet roll)

_3 sheets of different colours of metallic card

_Ruler, cutter or scalpel and cutting mat

_UHU glue or glue stick

How to make your Technicolor Kaleidoscope:

1. On the back of one of the metallic cards, draw a rectangle 4.3cm wide x 10.6cm high (the same height as the roll).

2. Draw a vertical line 5mm from the edge of the rectangle (so that you have a total width of 4.8 cm)

3. Cut the rectangle and pass the cutter a couple times over the 4.3cm limit without cutting all the way through. You´ll be left with a tab 5mm wide.

4. Fold the tab back.

5. Do the same with the other 2 colours of card.

© 2011 Fernanda de Uriarte

6. Now we´re going to put all the pieces of card together to make a triangle. So, put some UHU glue on the coloured side of the 5mm tab of one of your rectangles.

7. Get another rectangle and stick the ‘tab-less’ end to the tab of the other rectangle. You should be able to bend the 2 pieces of card together as if joined by a hinge.

8. Add the remaining rectangle in the same way.

9. Put some UHU glue on the tab of the last rectangle and close the triangle.

© 2011 Fernanda de Uriarte

10. Slide the metallic card triangle into the cardboard roll.

11. Cut a rectangle 20cm wide x 10.6cm high off one of your metallic cards. It could be one of the colours you used for the triangle or a new one.

12. Put UHU glue all around the cardboard roll and cover it with the rectangle you just cut. Put a bit of  UHU glue on the end of the rectangle to ‘close’ it.

© 2011 Fernanda de Uriarte

That´s it! Ready to look at the world through the eyes of a Technicolor Kaleidoscope?

© 2011 Fernanda de Uriarte

© 2011 Fernanda de Uriarte

See what happens with the colours? Try using different ones and find interesting patterns and textures to look at through the Kaleidoscope.

© 2011 Fernanda de Uriarte

© 2011 Fernanda de Uriarte

© 2011 Fernanda de Uriarte

Quite fun to take pictures too!

© 2011 Fernanda de Uriarte

Enjoy the colour!

38_Organic Mr. Potato Head

27 Oct

Not the biggest fan of veg? Organic Mr. Potato Head will have you begging for more!

© 2011 Fernanda de Uriarte

It is super easy to make but you´ll need the help of a grown up to help you cook the vegetables.

You´ll need:

_ A boiled or baked potato

_Cooked vegetables that could work as eyes, nose, ears, etc..

_A few toothpicks.

How to make Organic Mr. Potato Head:

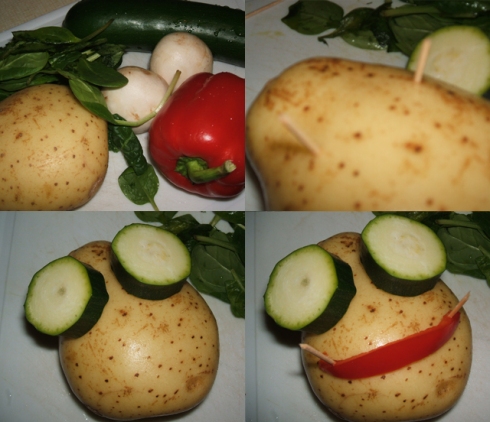
1. Stick a couple of toothpicks into the potato where you want the eyes to be.

2. Grab a couple slices of veggie goodness and stick ’em on the toothpicks to make the eyes of Mr. Potato Head. I used courgettes.

3. Keep going until you’ve given Mr. Potato Head a mouth, ears, hair and whatever you can think of.

© 2011 Fernanda de Uriarte

© 2011 Fernanda de Uriarte

4. Eat your vegetables and see Mr. Potato change.. Add more stuff and eat it all again.

5. Repeat the process until you´ve finished all your vegetables!

© 2011 Fernanda de Uriarte

Why not try a Mrs. Egg plant Head Miss Tuti Fruty?…

Mr. Beetroot? Yeah I know.. that was pushing it a bit too far.

Have tons of healthy fun.


37_Building Set

27 Oct

If you dream of being an architect, like playing house or have tons of interior design (or IKEA) catalogues lying around, this toy is for you.

© 2011 Fernanda de Uriarte

It will take you about an hour to make a building set of  24 pieces.

You´ll need:

_2 A4 pieces of card

_Ruler, pencil, cutter/scalpel and cutting mat.

_A few magazines or catalogues with images of house/building stuff.

_Glue stick.

How to make your Building set:

1. On each of your A4 pieces of cardboard draw a grid of squares 7×7 cm. You`ll be able to fit 4 squares across and 3 down (12 total on each A4, 24 total)

2. Draw a vertical line 5mm into the square from each side of the squares.

3. Mark the middle of each of this new lines.  (check the photo below)

4. Cut all the squares.

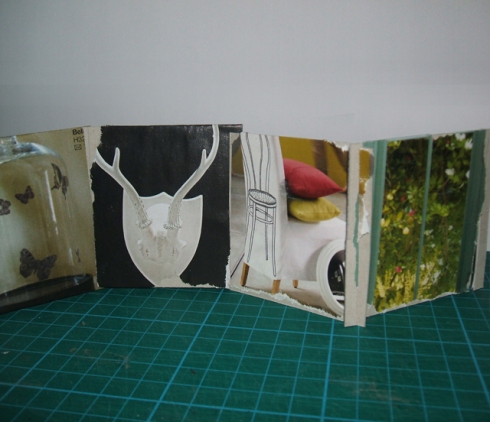
5. Make a slit from the half down on each of the vertical lines 5mm in. You should have 2 slits on each square that will allow you to slot them together as shown below.

© 2011 Fernanda de Uriarte

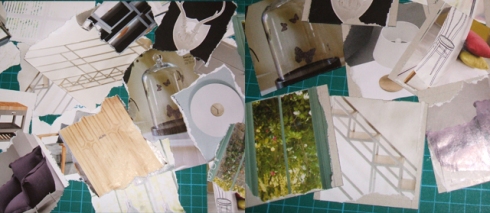
6. Rip a bunch of nice images off your catalogues/magazines. Try to get a bit of everything: windows, doors, staircases, furniture… Make sure you have at least 24 images to cover at least one side of each square. If you have more you could cover both sides and build  interiors and exteriors.

7. Stick the images on the card squares. Make sure to cut over the pictures if you covered the slit when sticking on the card. Note that in order to build you must alternate between slits facing up and down, so make sure you stick some images facing up, and some facing down.

© 2011 Fernanda de Uriarte

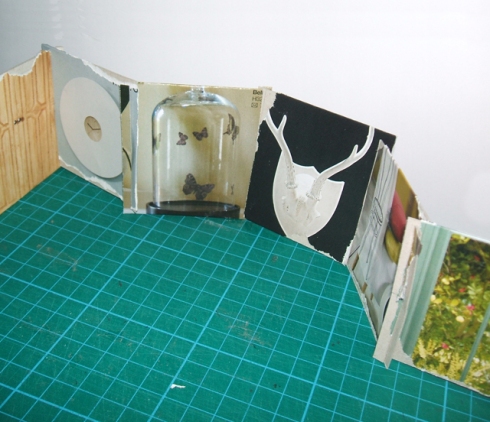
8. Slot the squares together, stack them, arrange them as you like…

© 2011 Fernanda de Uriarte

© 2011 Fernanda de Uriarte

© 2011 Fernanda de Uriarte

© 2011 Fernanda de Uriarte

What if instead of sticking images you drew each bit of your building?… or how fun would it be to use pictures of car parts or robot parts?!

Use your imagination and get building!

36_Multicolour

27 Oct

At last! the ultimate drawing tool is here… the Multicolour!

© 2011 Fernanda de Uriarte

This is a quick an easy one. It´ll take you about 15 minutes to make.

You´ll need:

_A piece of card or cardboard (maybe a recycled box)

_A circle cutter or a compass and scissors/scalpel

_A pen or pointy pencil

_Tons of different coloured pencils, crayons or markers.

How to make your Multicolour:

1. Cut a circle about 15 cm in diameter from your piece of card or cardboard.

2. Using the pen or pointy pencil, punch a hole in the middle of the cardboard circle (where the pointy bit of the circle cutter used to be). Make sure it is wide enough to fit your coloured pencils, markers, etc..

3. Punch as many holes as coloured pencils, markers, etc. you want to put into your Multicolour.

© 2011 Fernanda de Uriarte

4. Insert different colours into the holes and get drawing….

© 2011 Fernanda de Uriarte

© 2011 Fernanda de Uriarte

© 2011 Fernanda de Uriarte

Any use for your homework? (it´s not cheating! it´s making use of all your resources 😉 )

© 2011 Fernanda de Uriarte

Happy multi-colouring!